
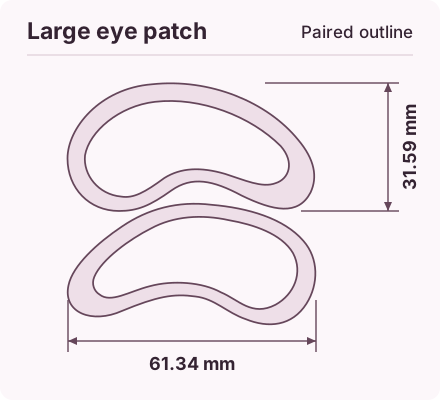
Review the two sizes separately
Specify the intended major and minor dimensions for each crescent, with the inside curve and taper shown at scale. Changing size can redistribute the available adhesive border.
A clear label on the dieline helps manufacturing distinguish paired left and right forms from symmetric copies. Sample the product exactly as it would appear on the release sheet.
Look closely at the tips
Evaluate lifting, folds and liner access at the two tips and inside edge. Compare on the intended shape since backing tension can concentrate near taper changes.
Make sure the outline and project instructions describe the intended cosmetic placement. The responsible product team should review eye-area proximity and any required warnings.
Control the opening route
Give the reviewer an unmistakable grip point on the proposed liner or tray. Taking the patch out should preserve its orientation and shape.
Place a side-on reference photo in the sample brief to help designers line up the cut, insert and pouch. Keep the nominated sizes under separate sample IDs when approvals differ.
- Large and small at-scale drawings
- Inside-curve and tip observations
- Left/right or symmetrical pack layout
Frequently asked questions
Can the large crescent use the same backing as the small one?
A common grade may be feasible. Compare both sizes and record any changes in lift, handling or liner access before approval.